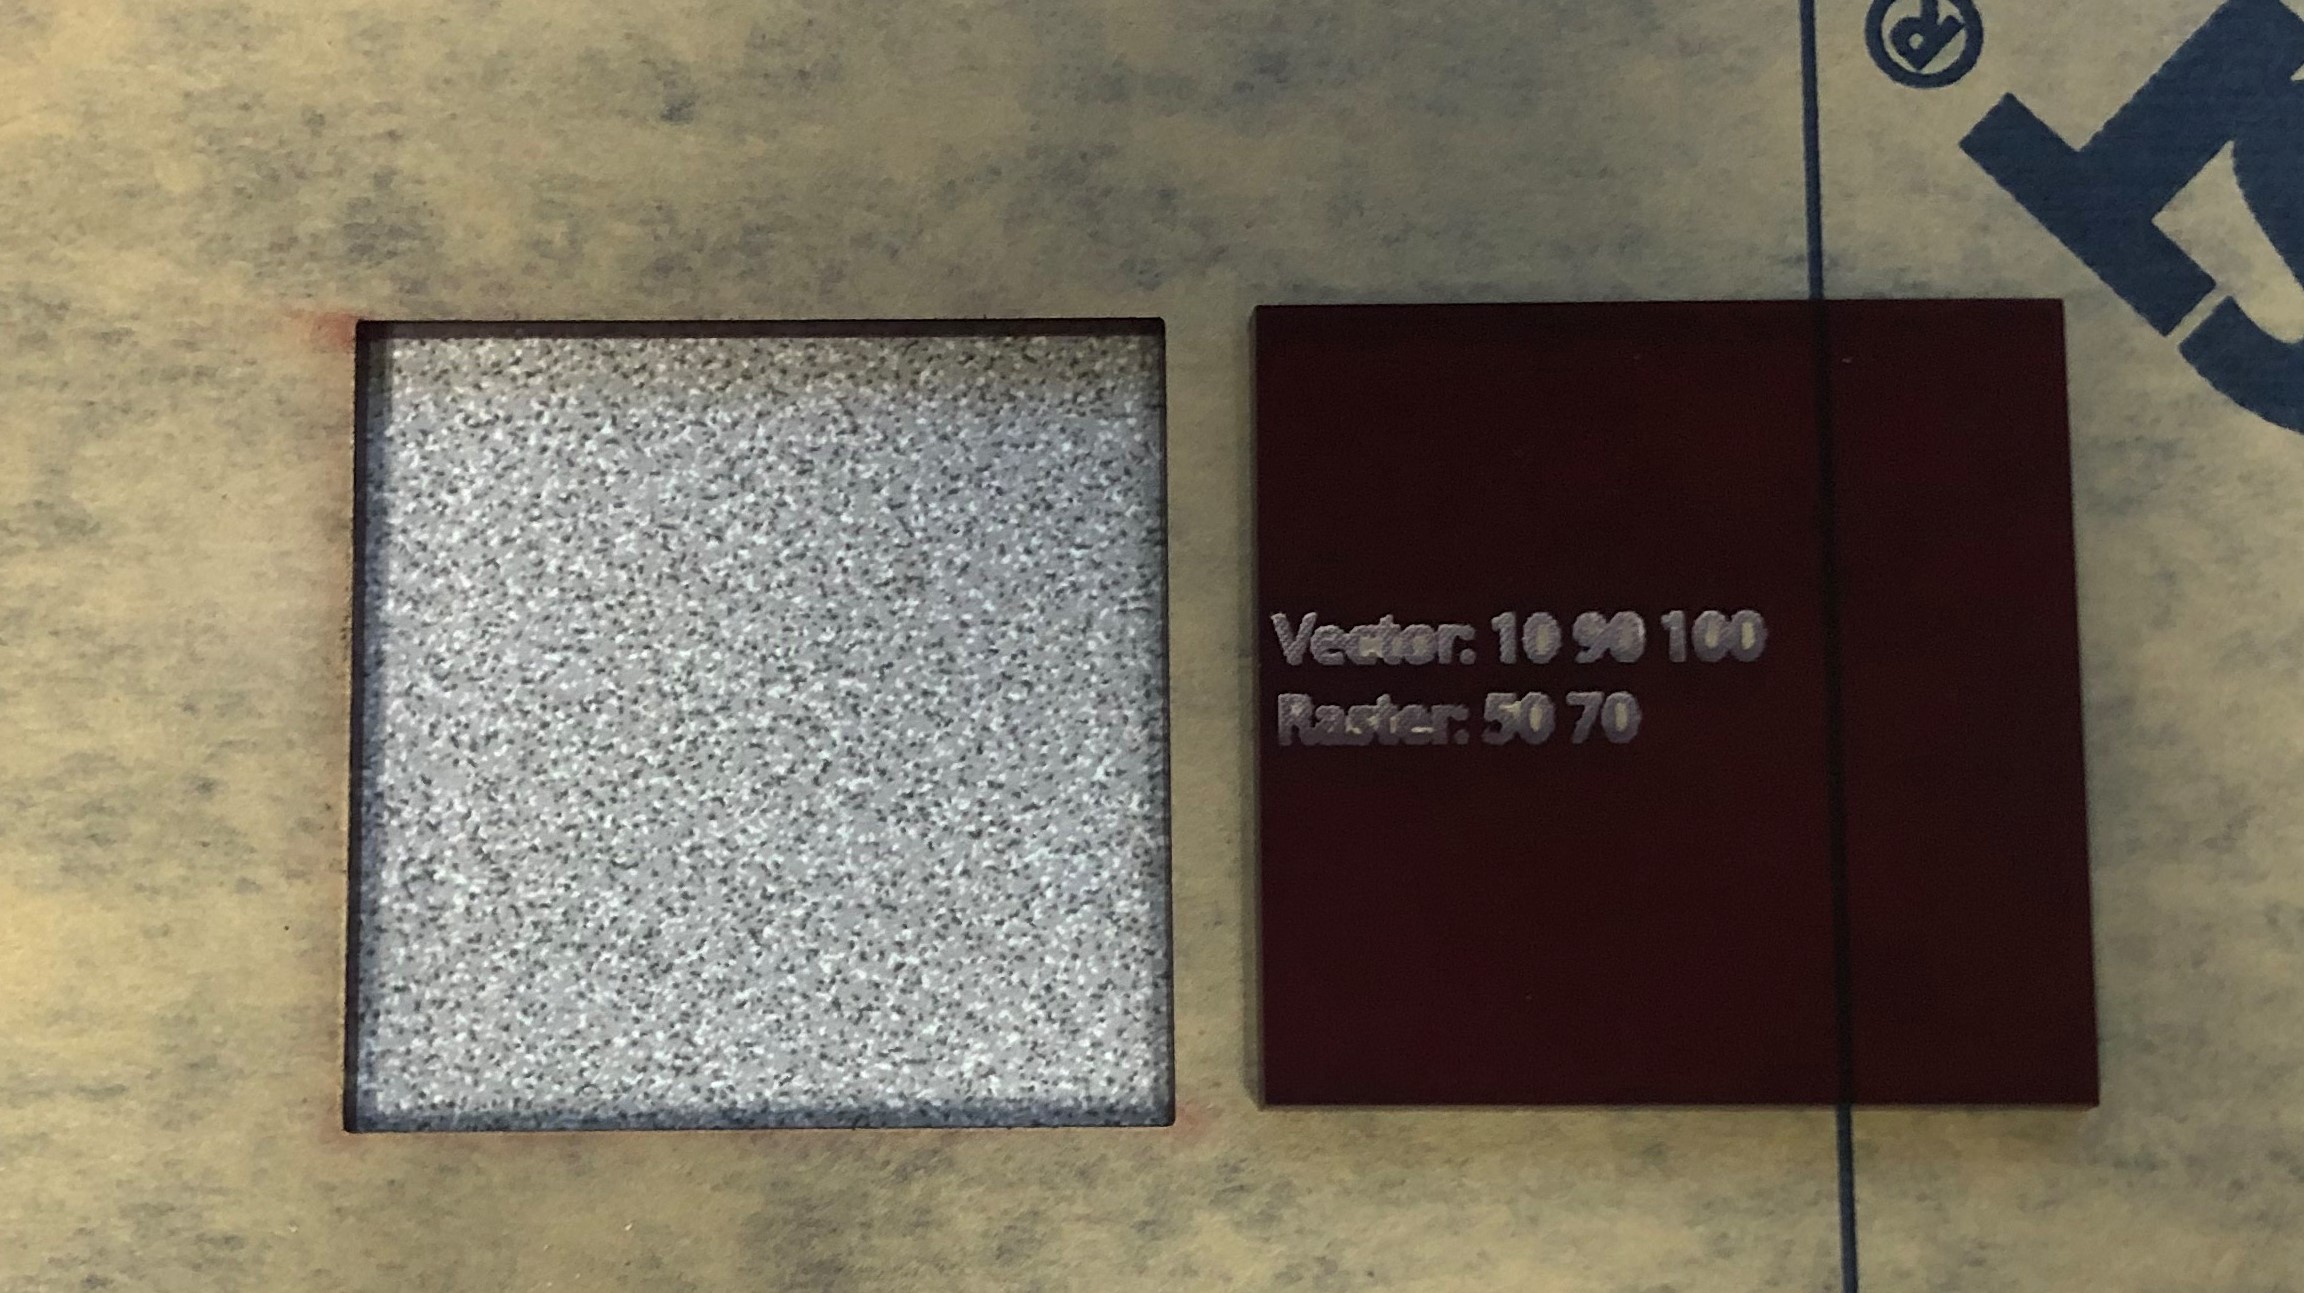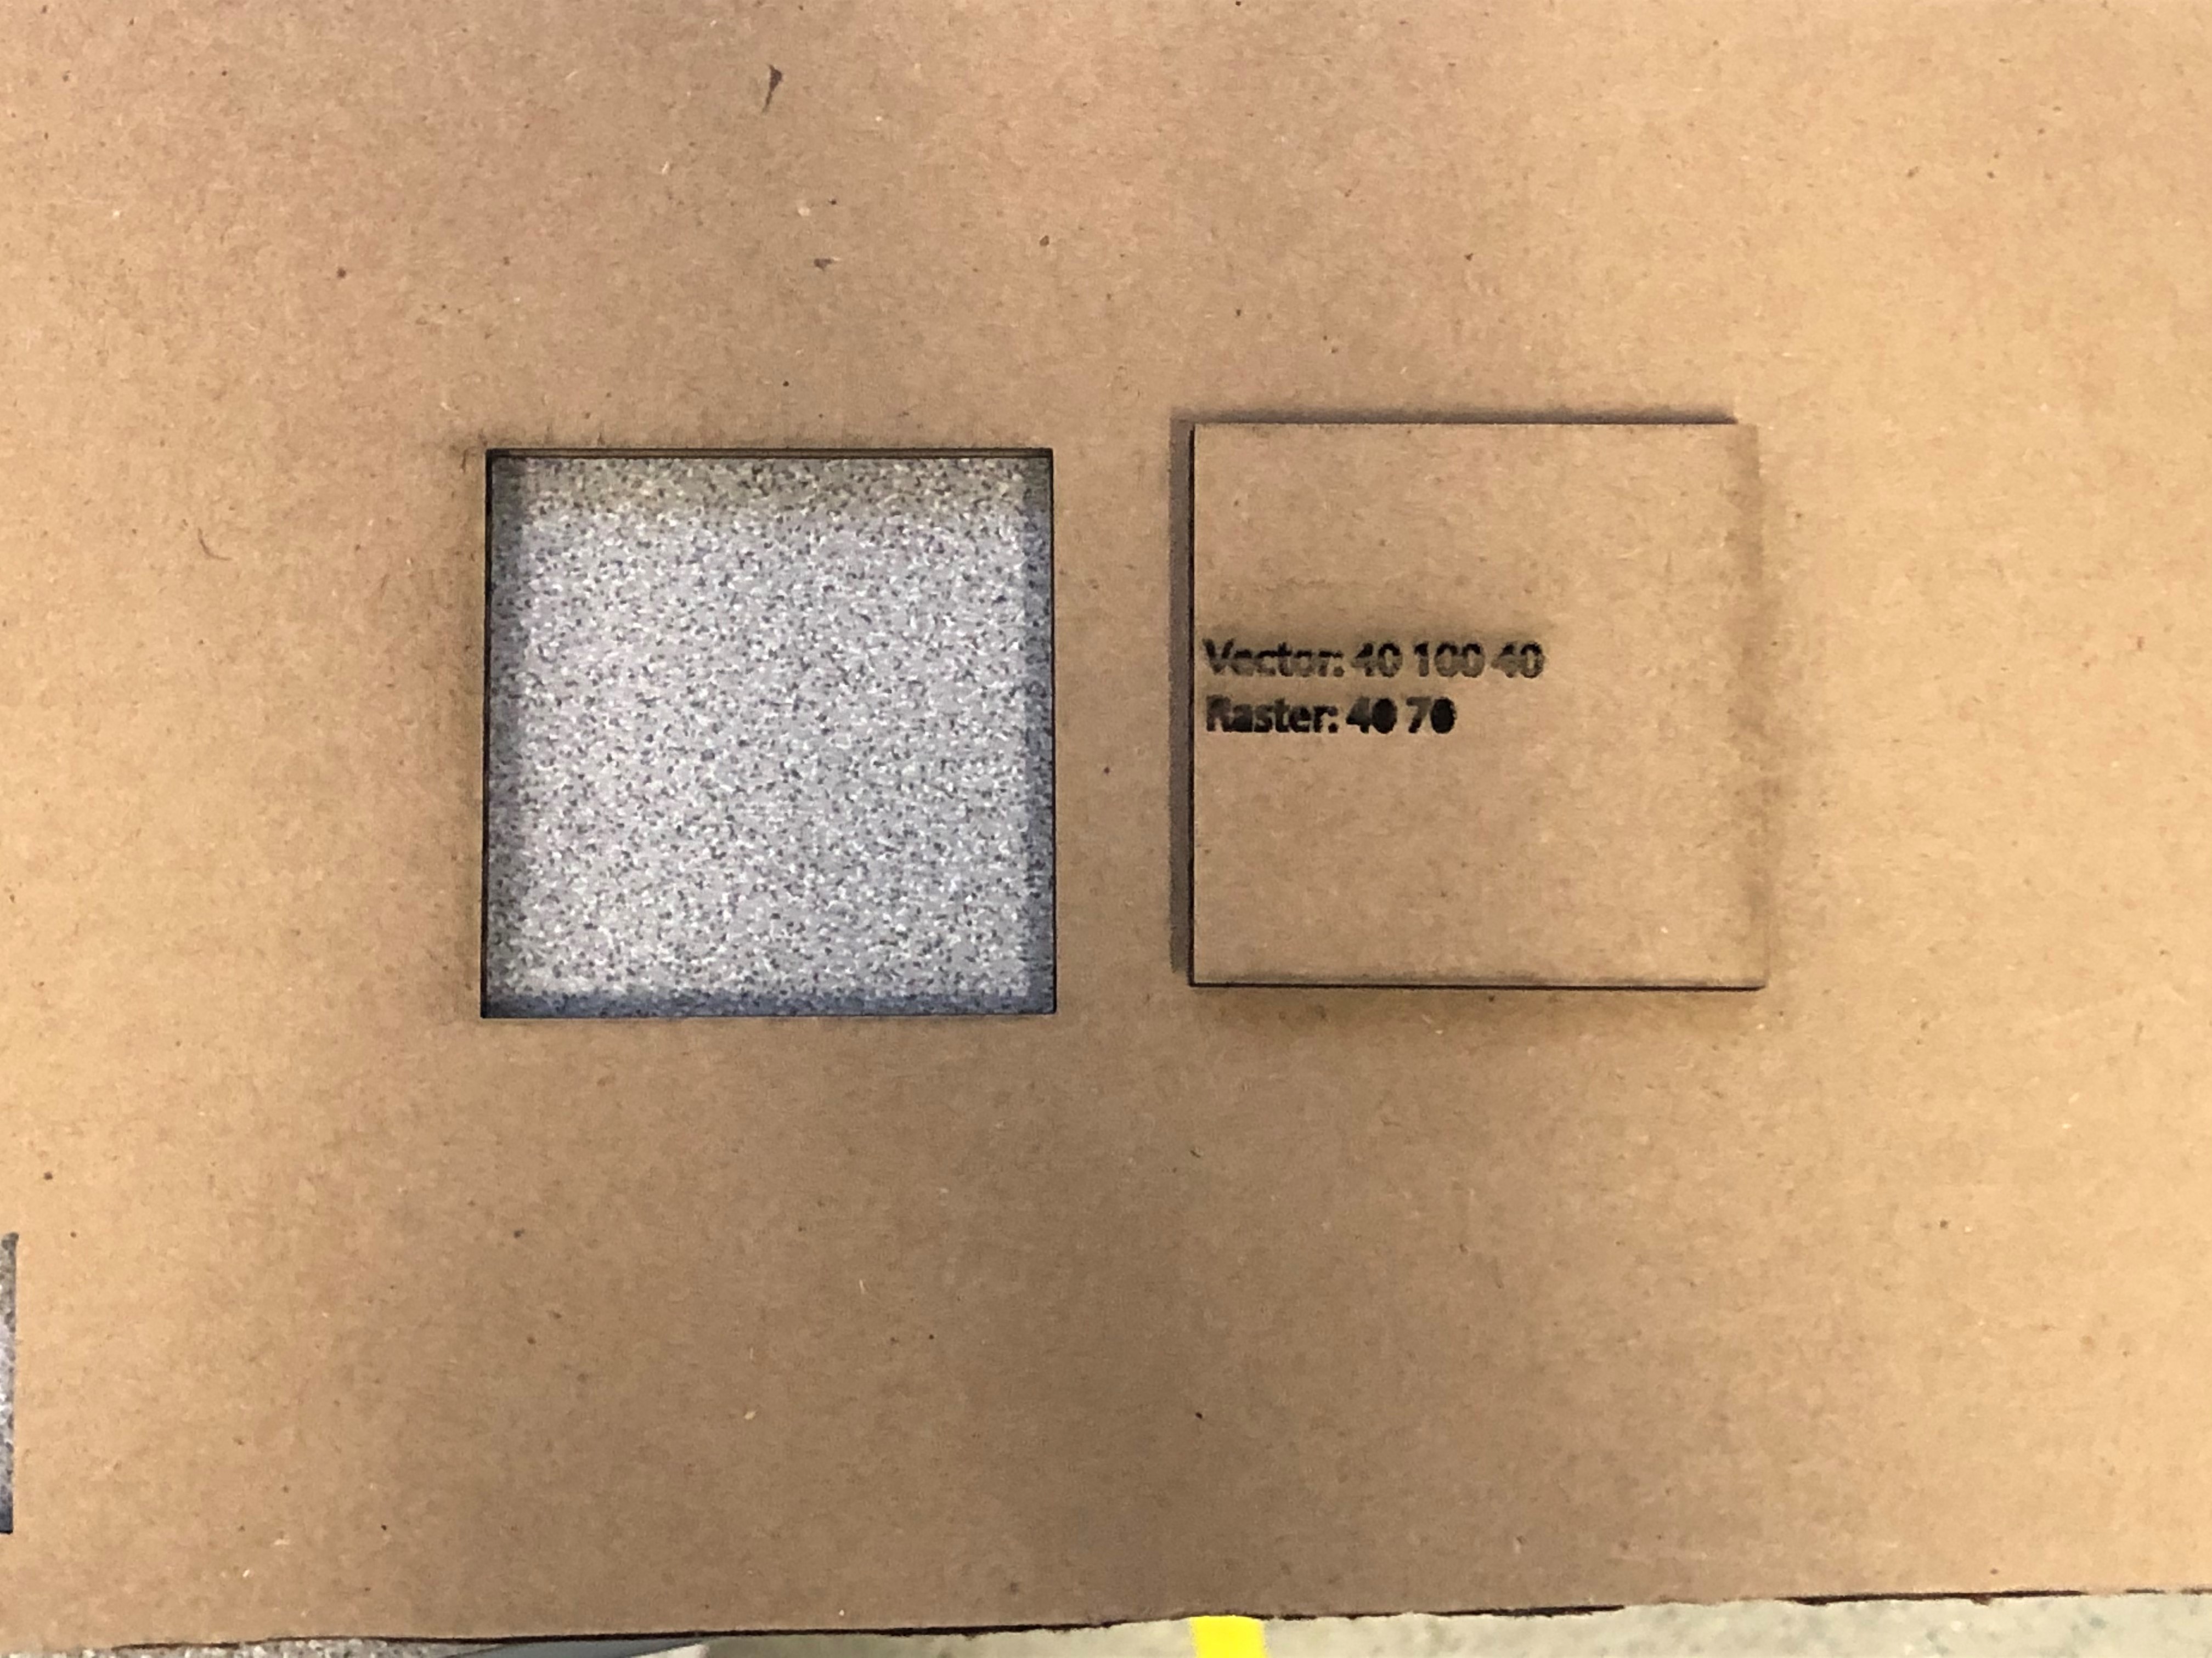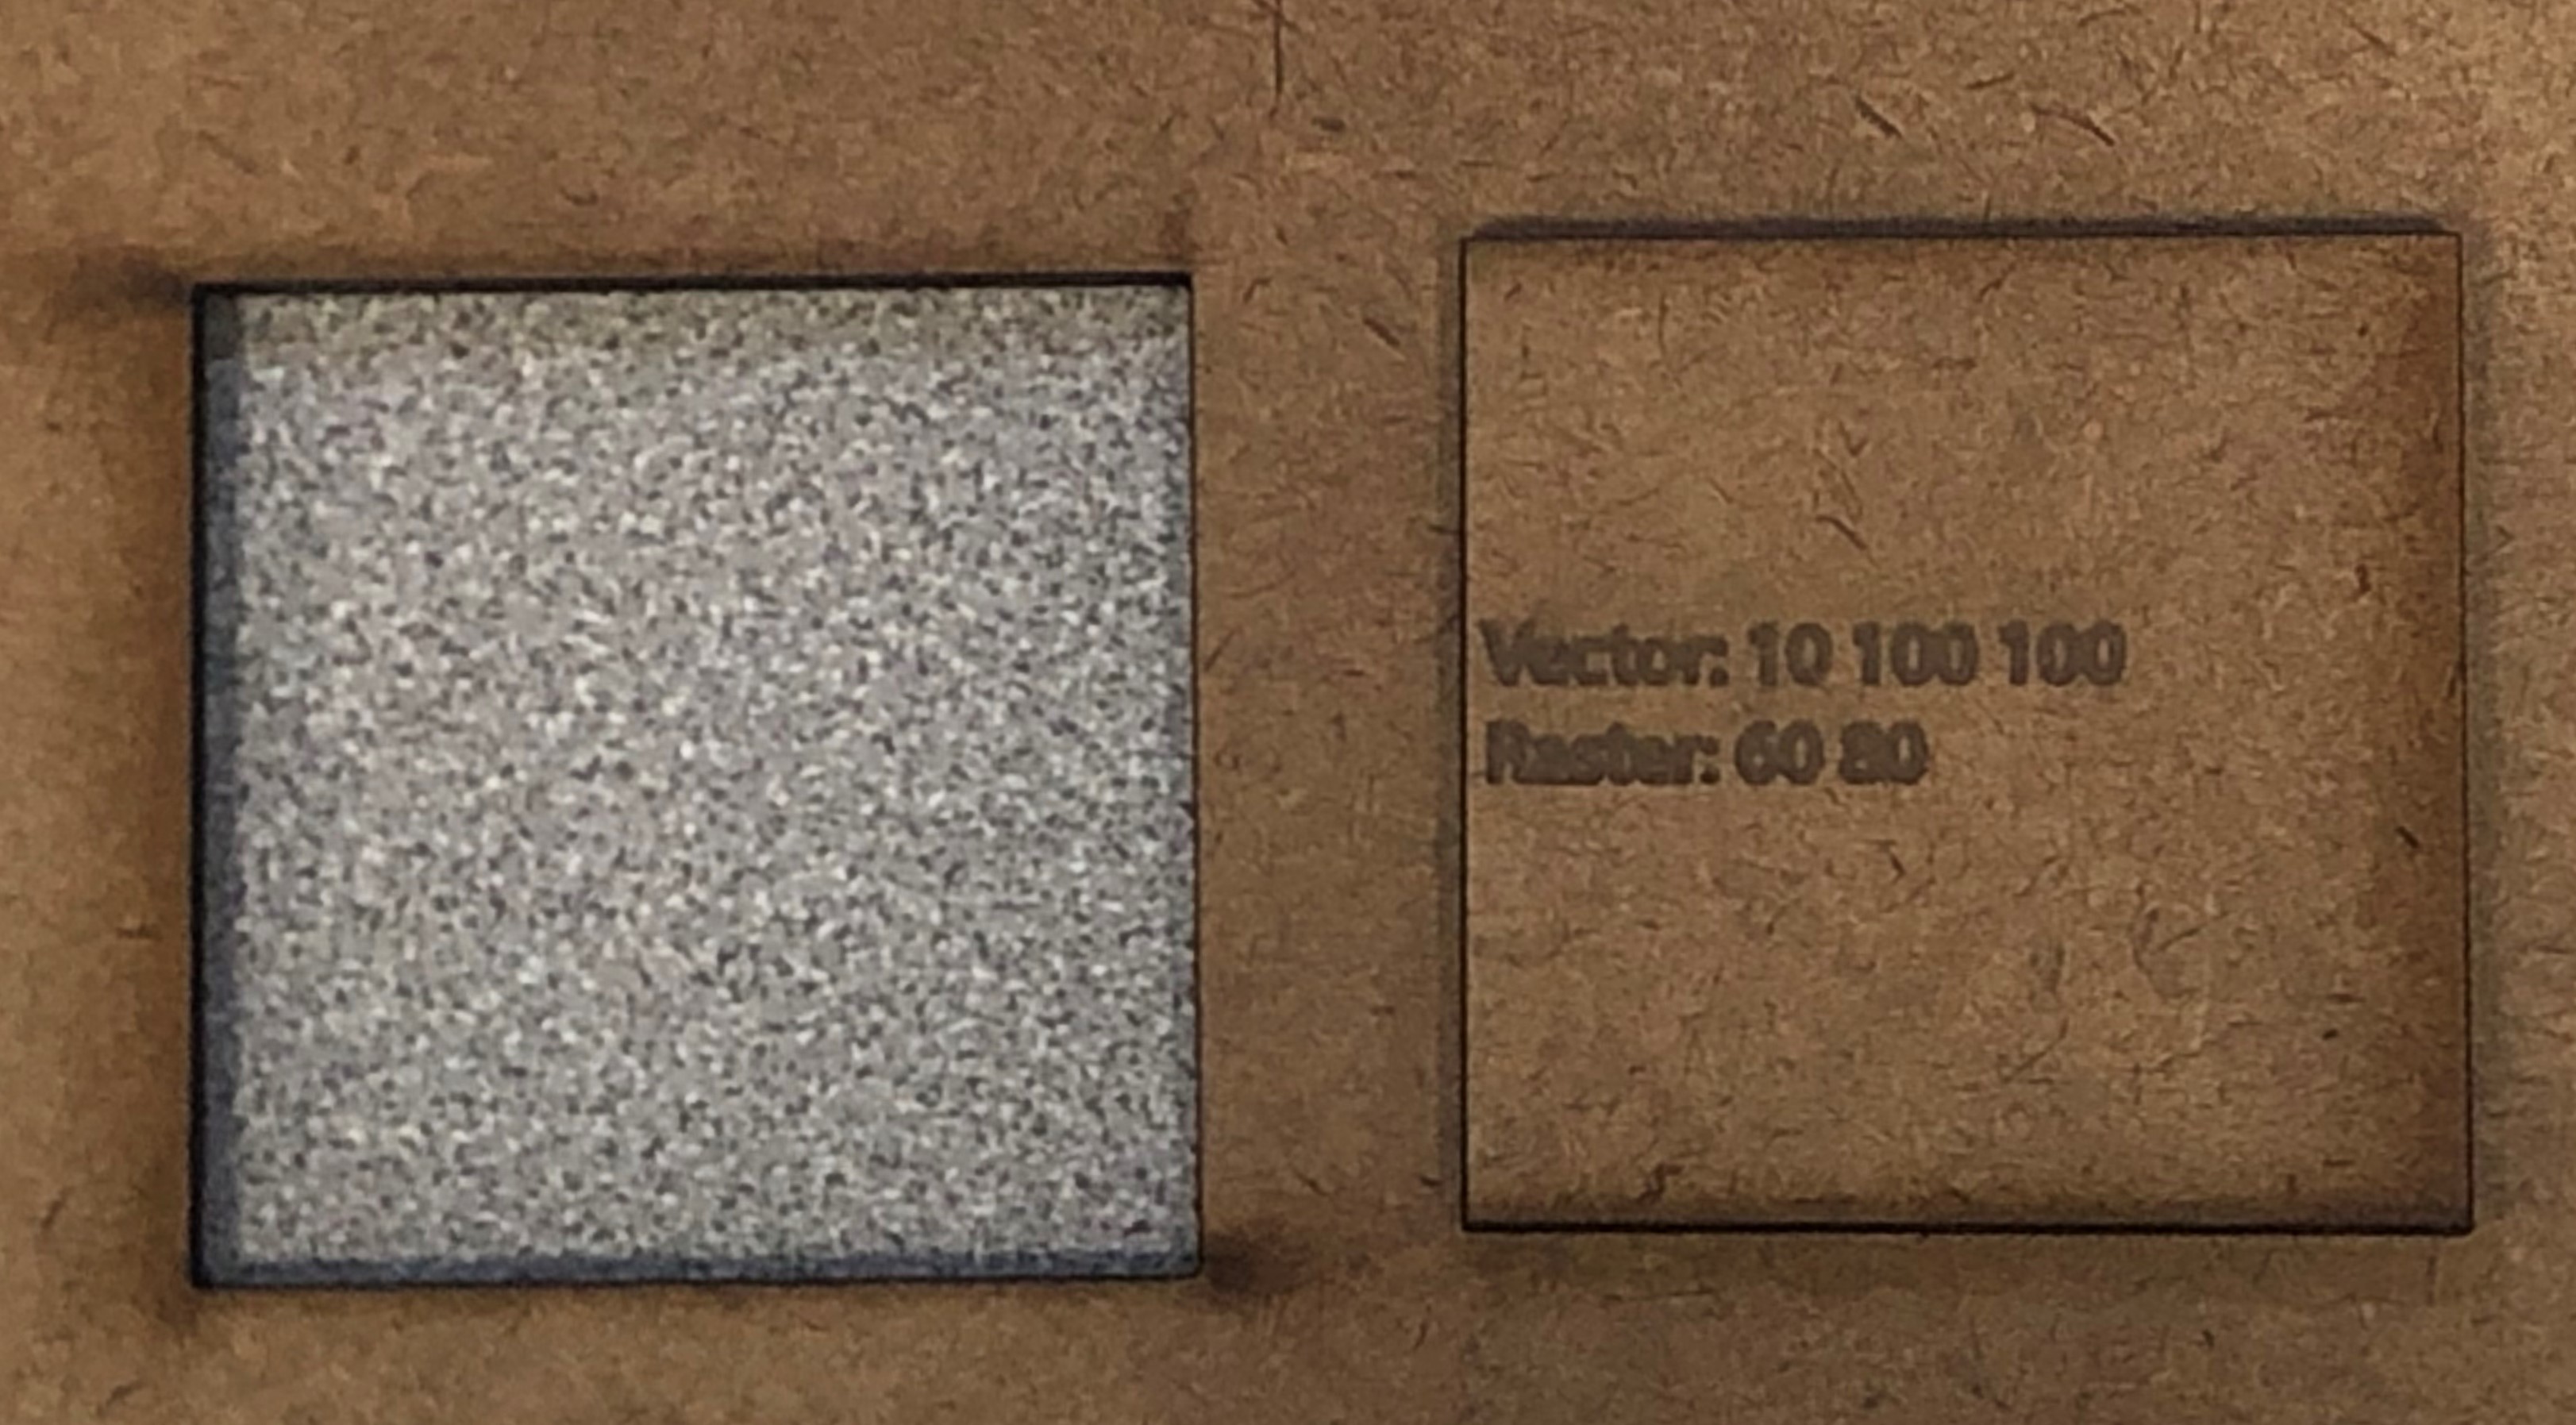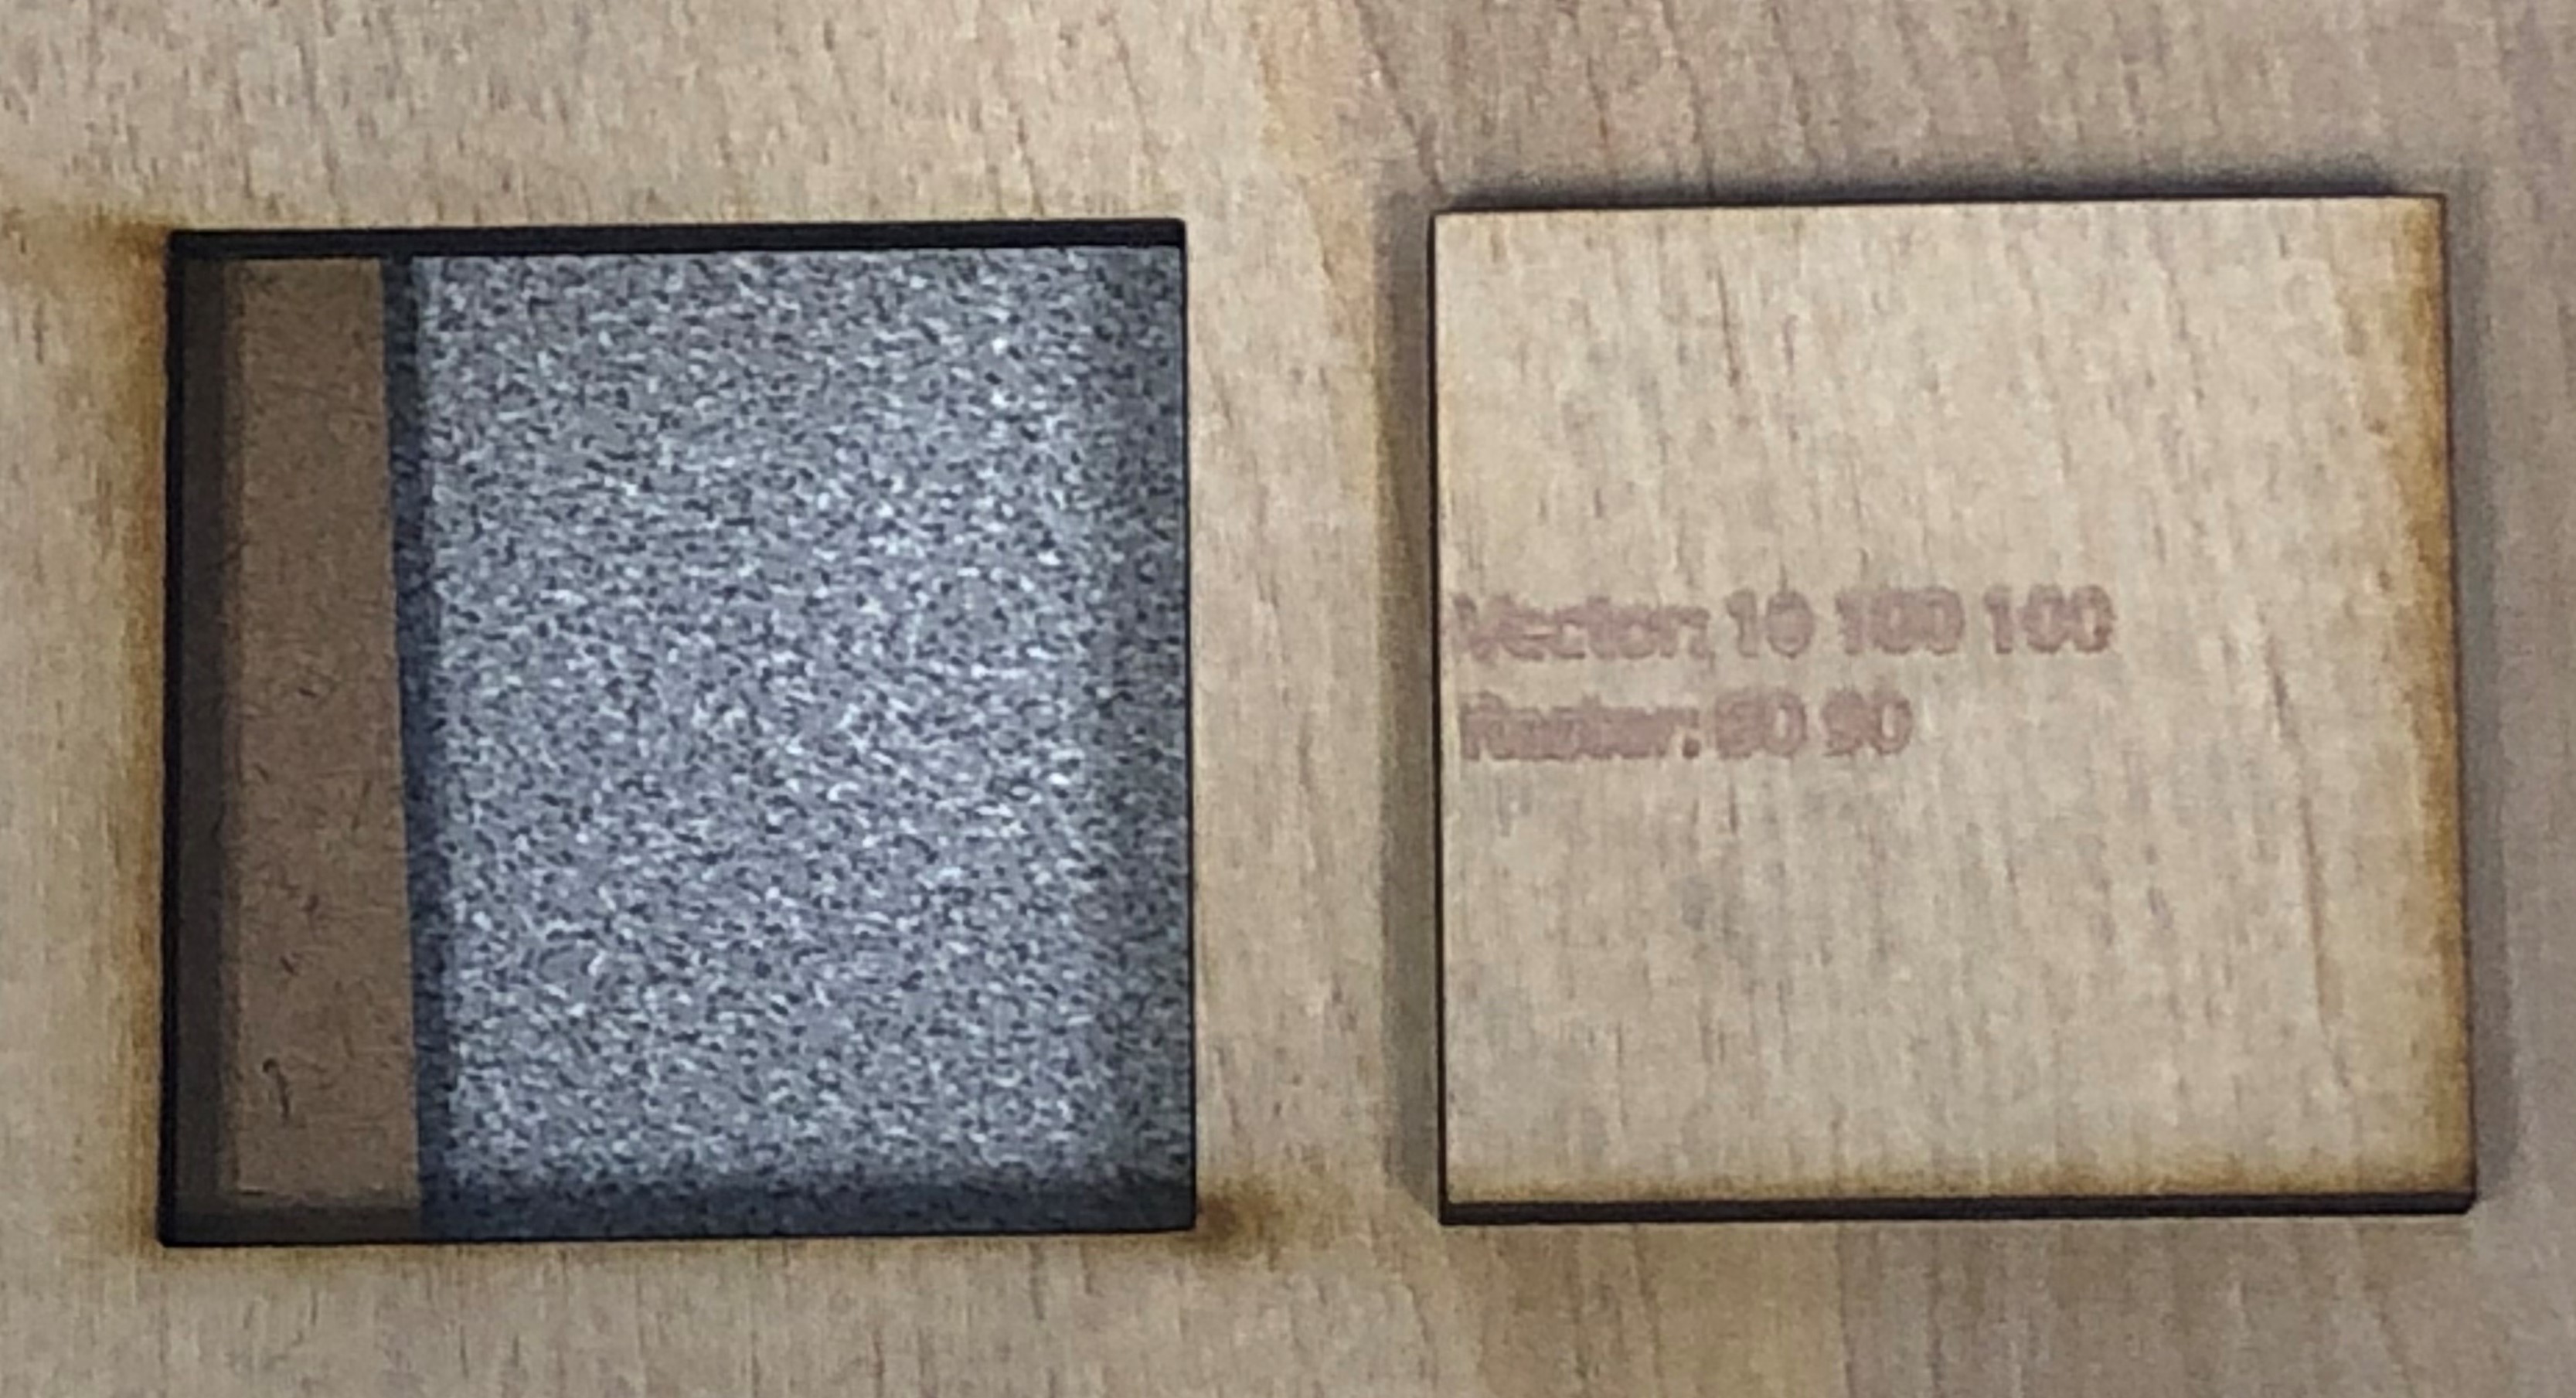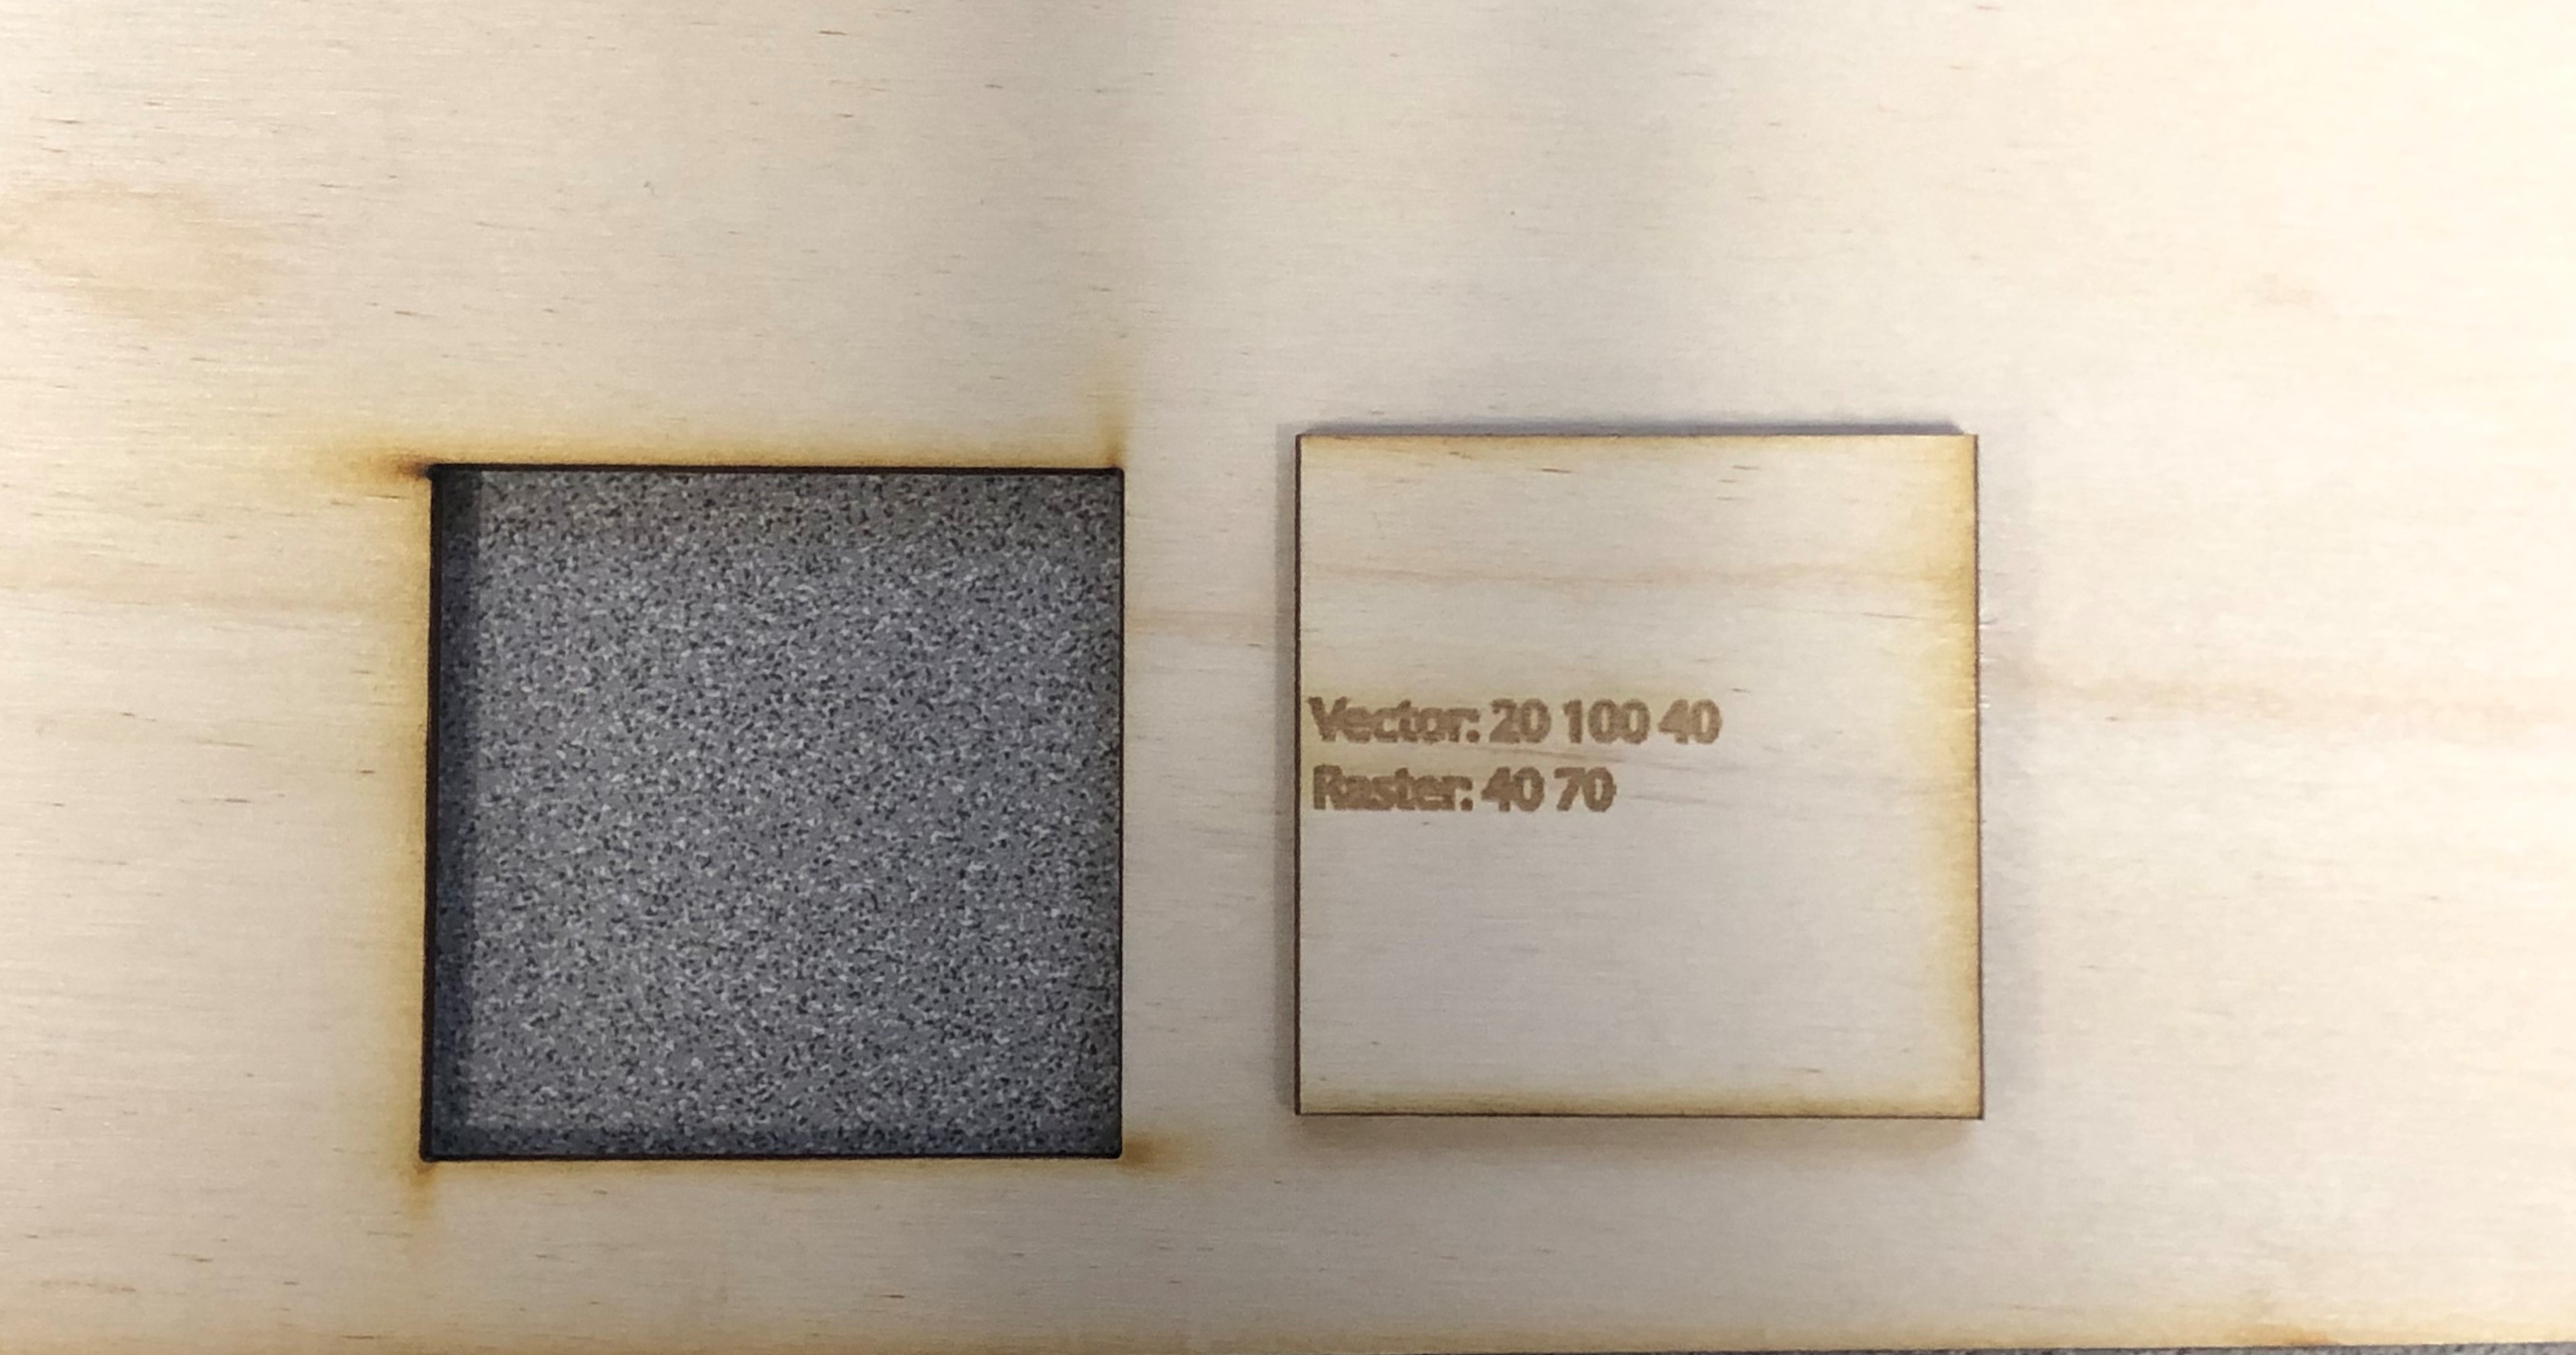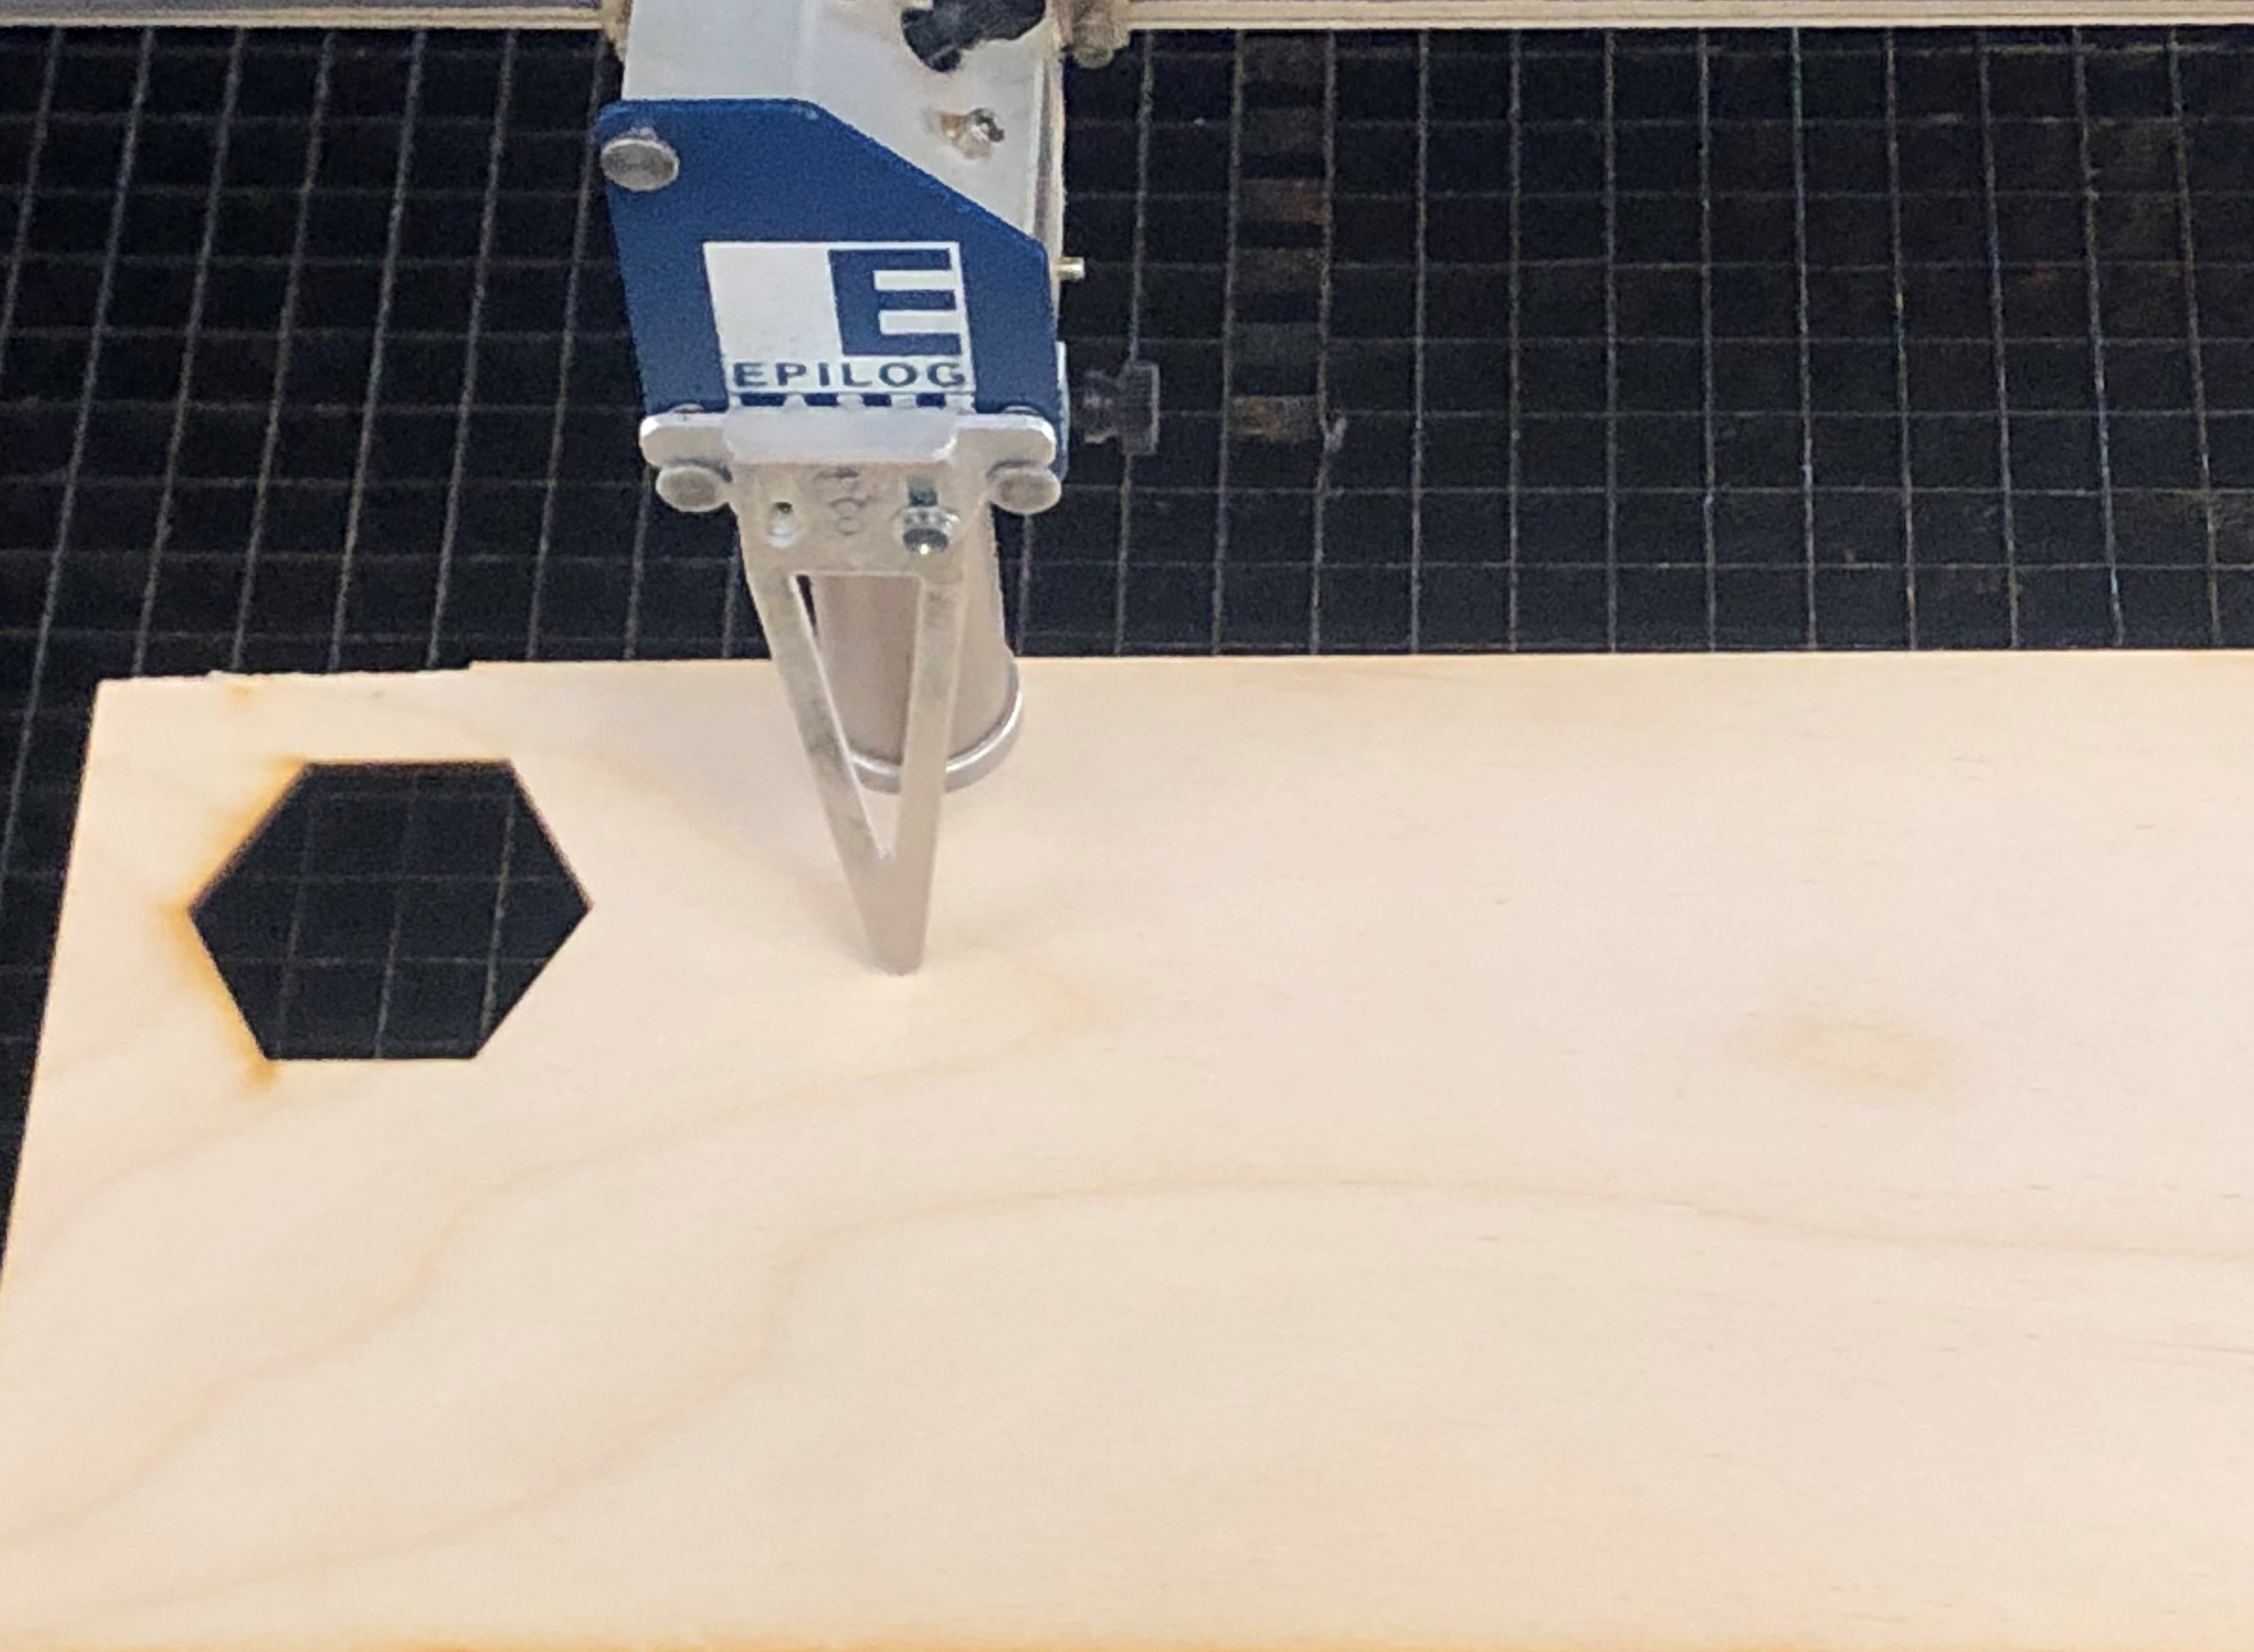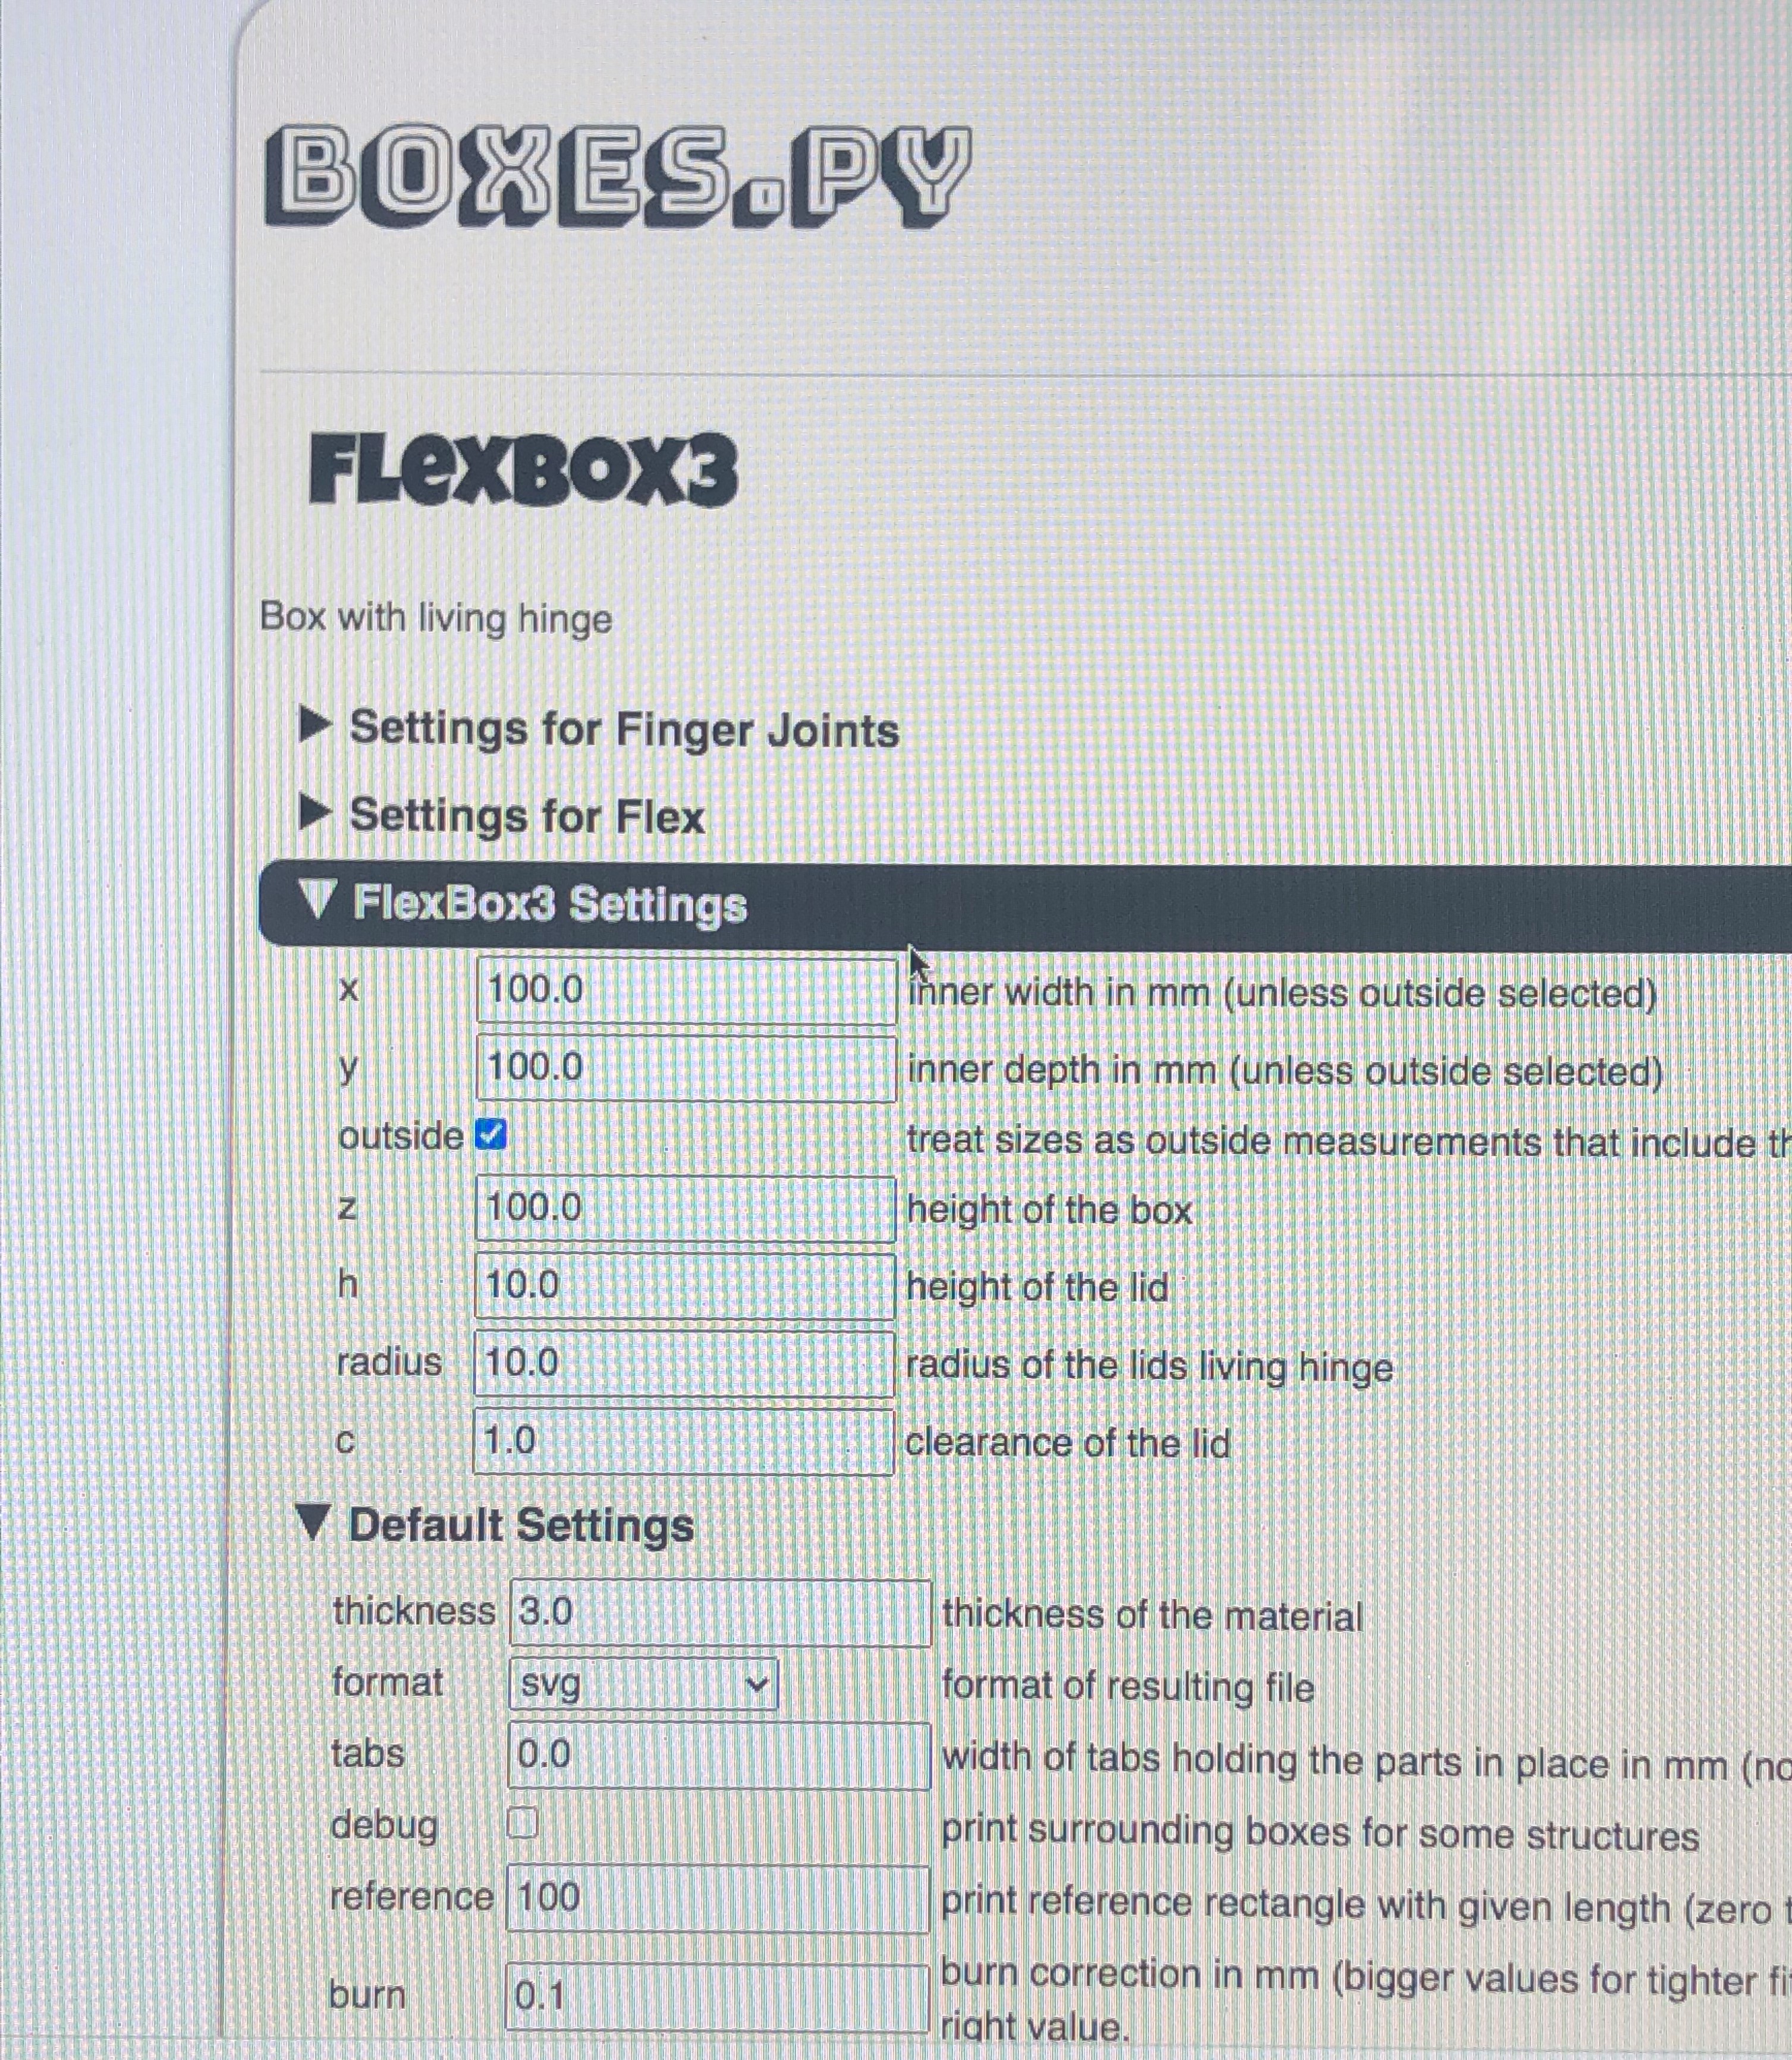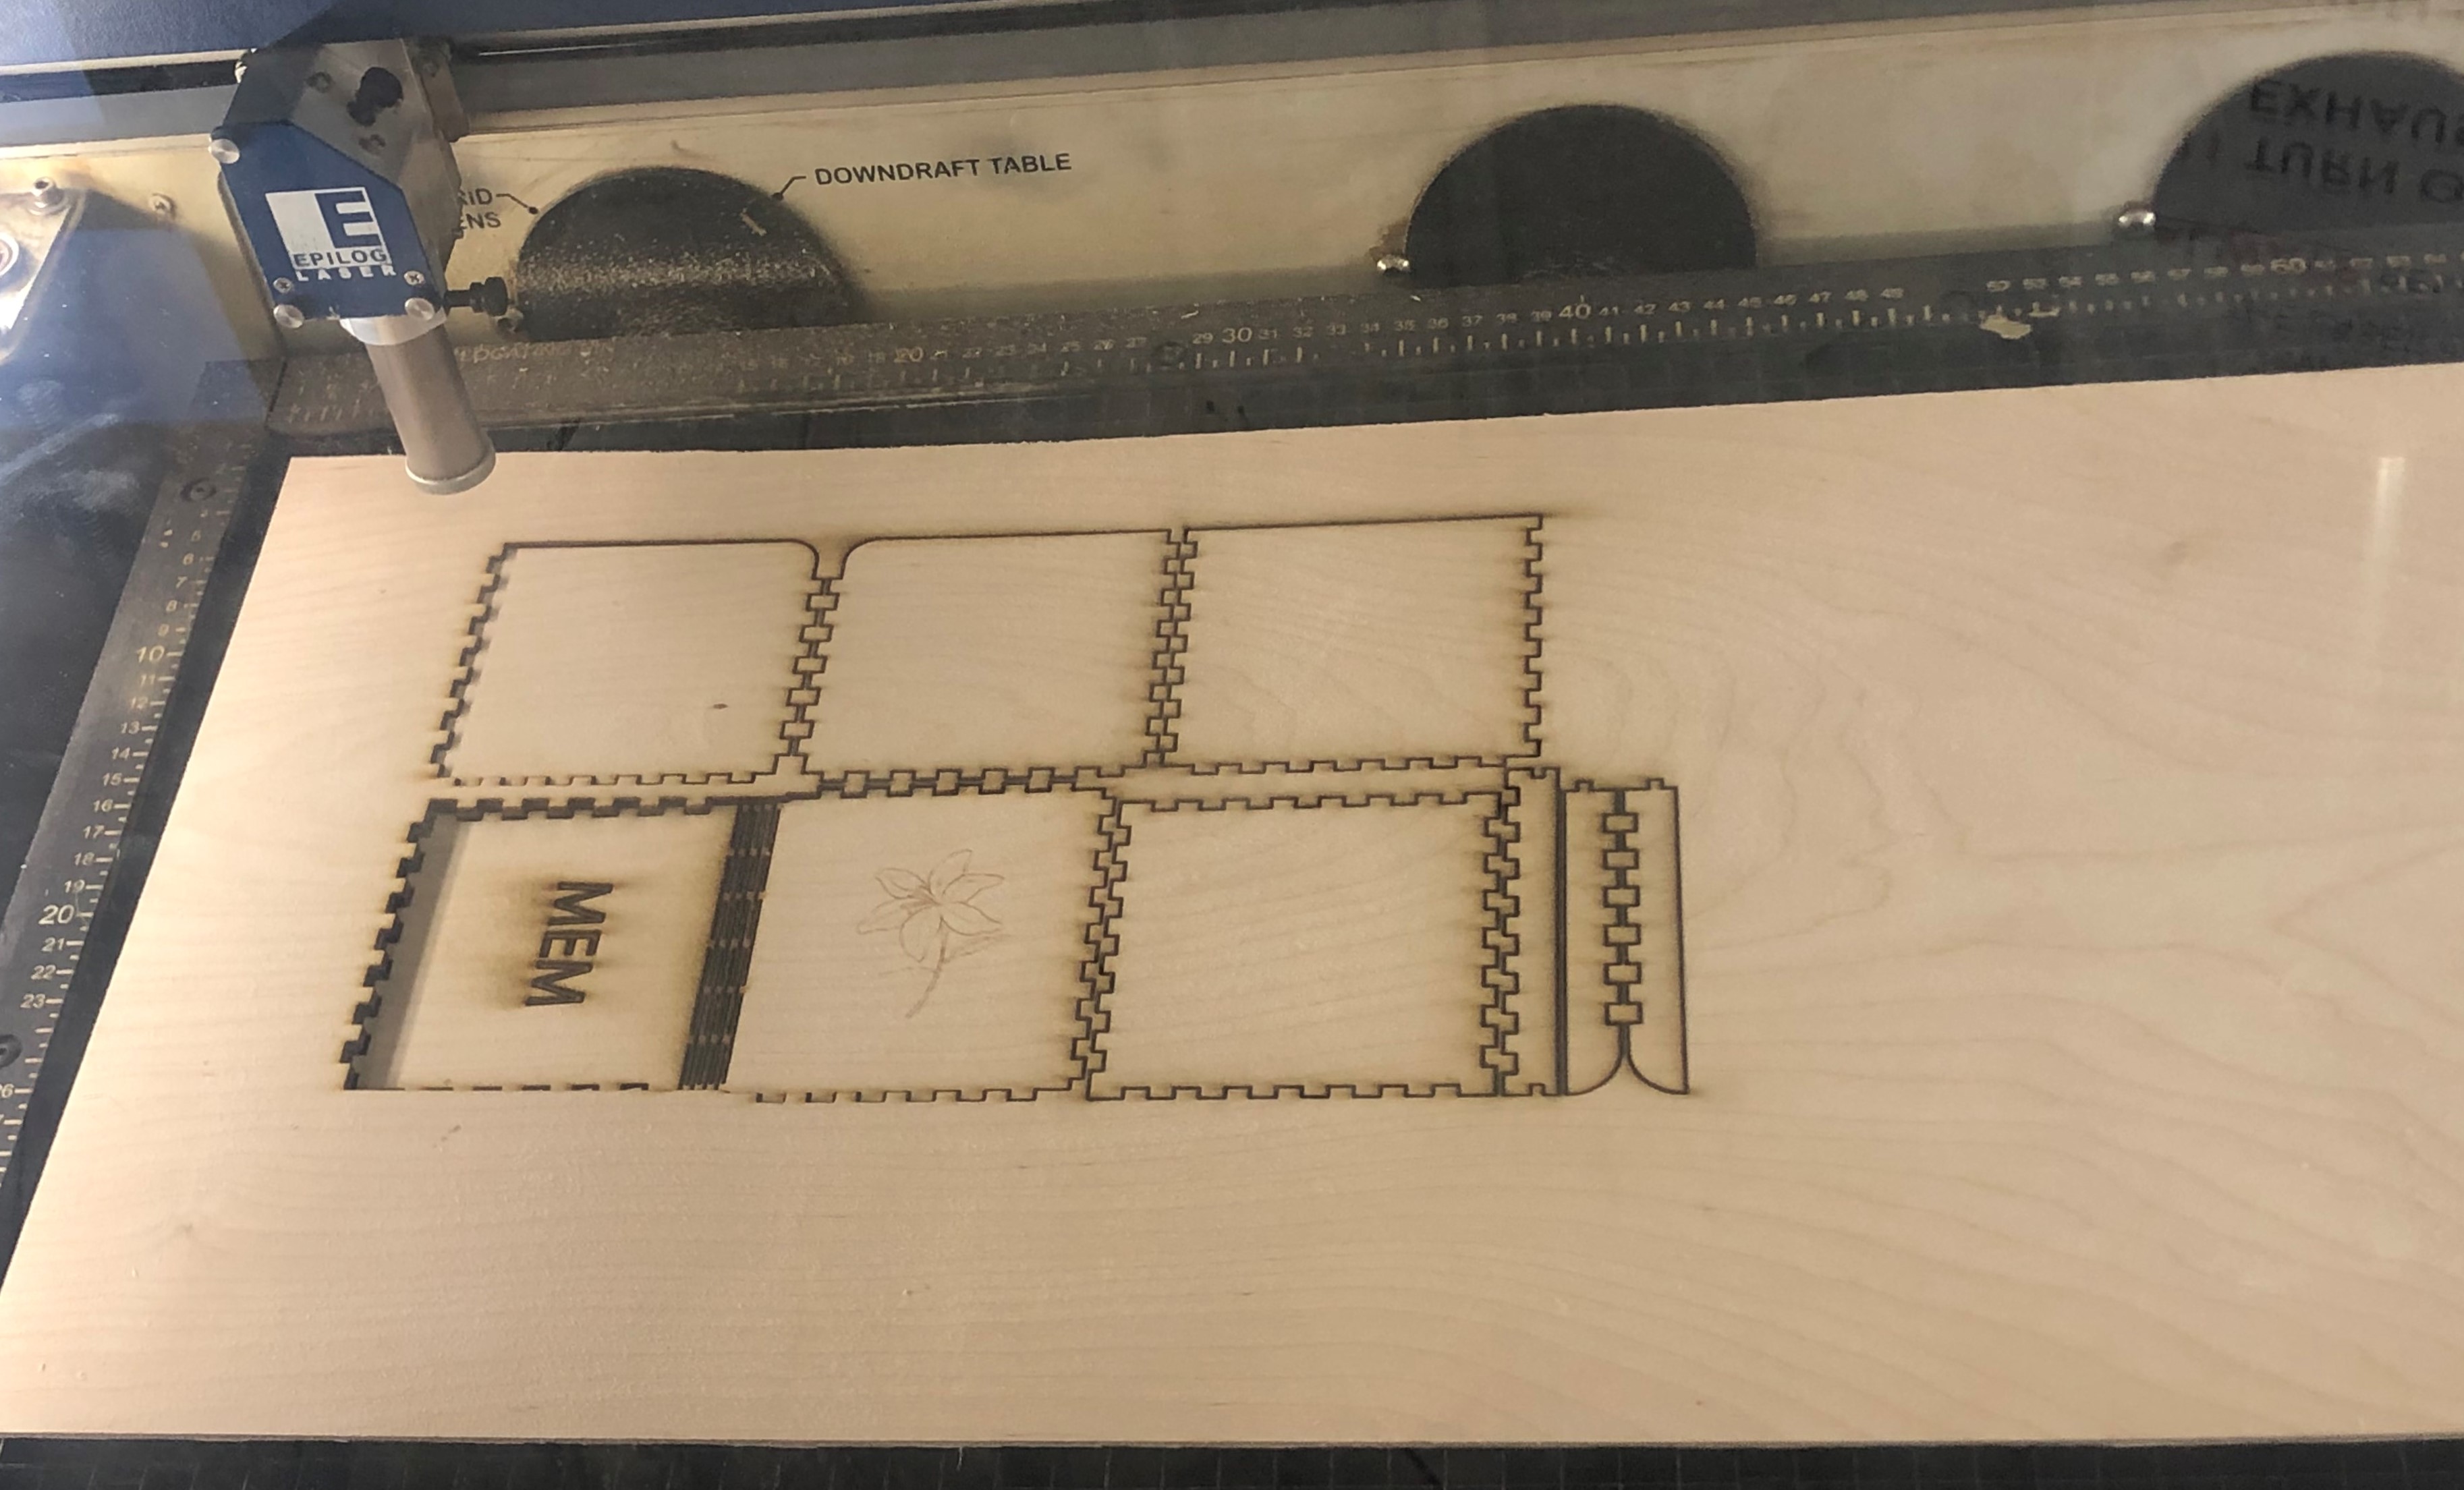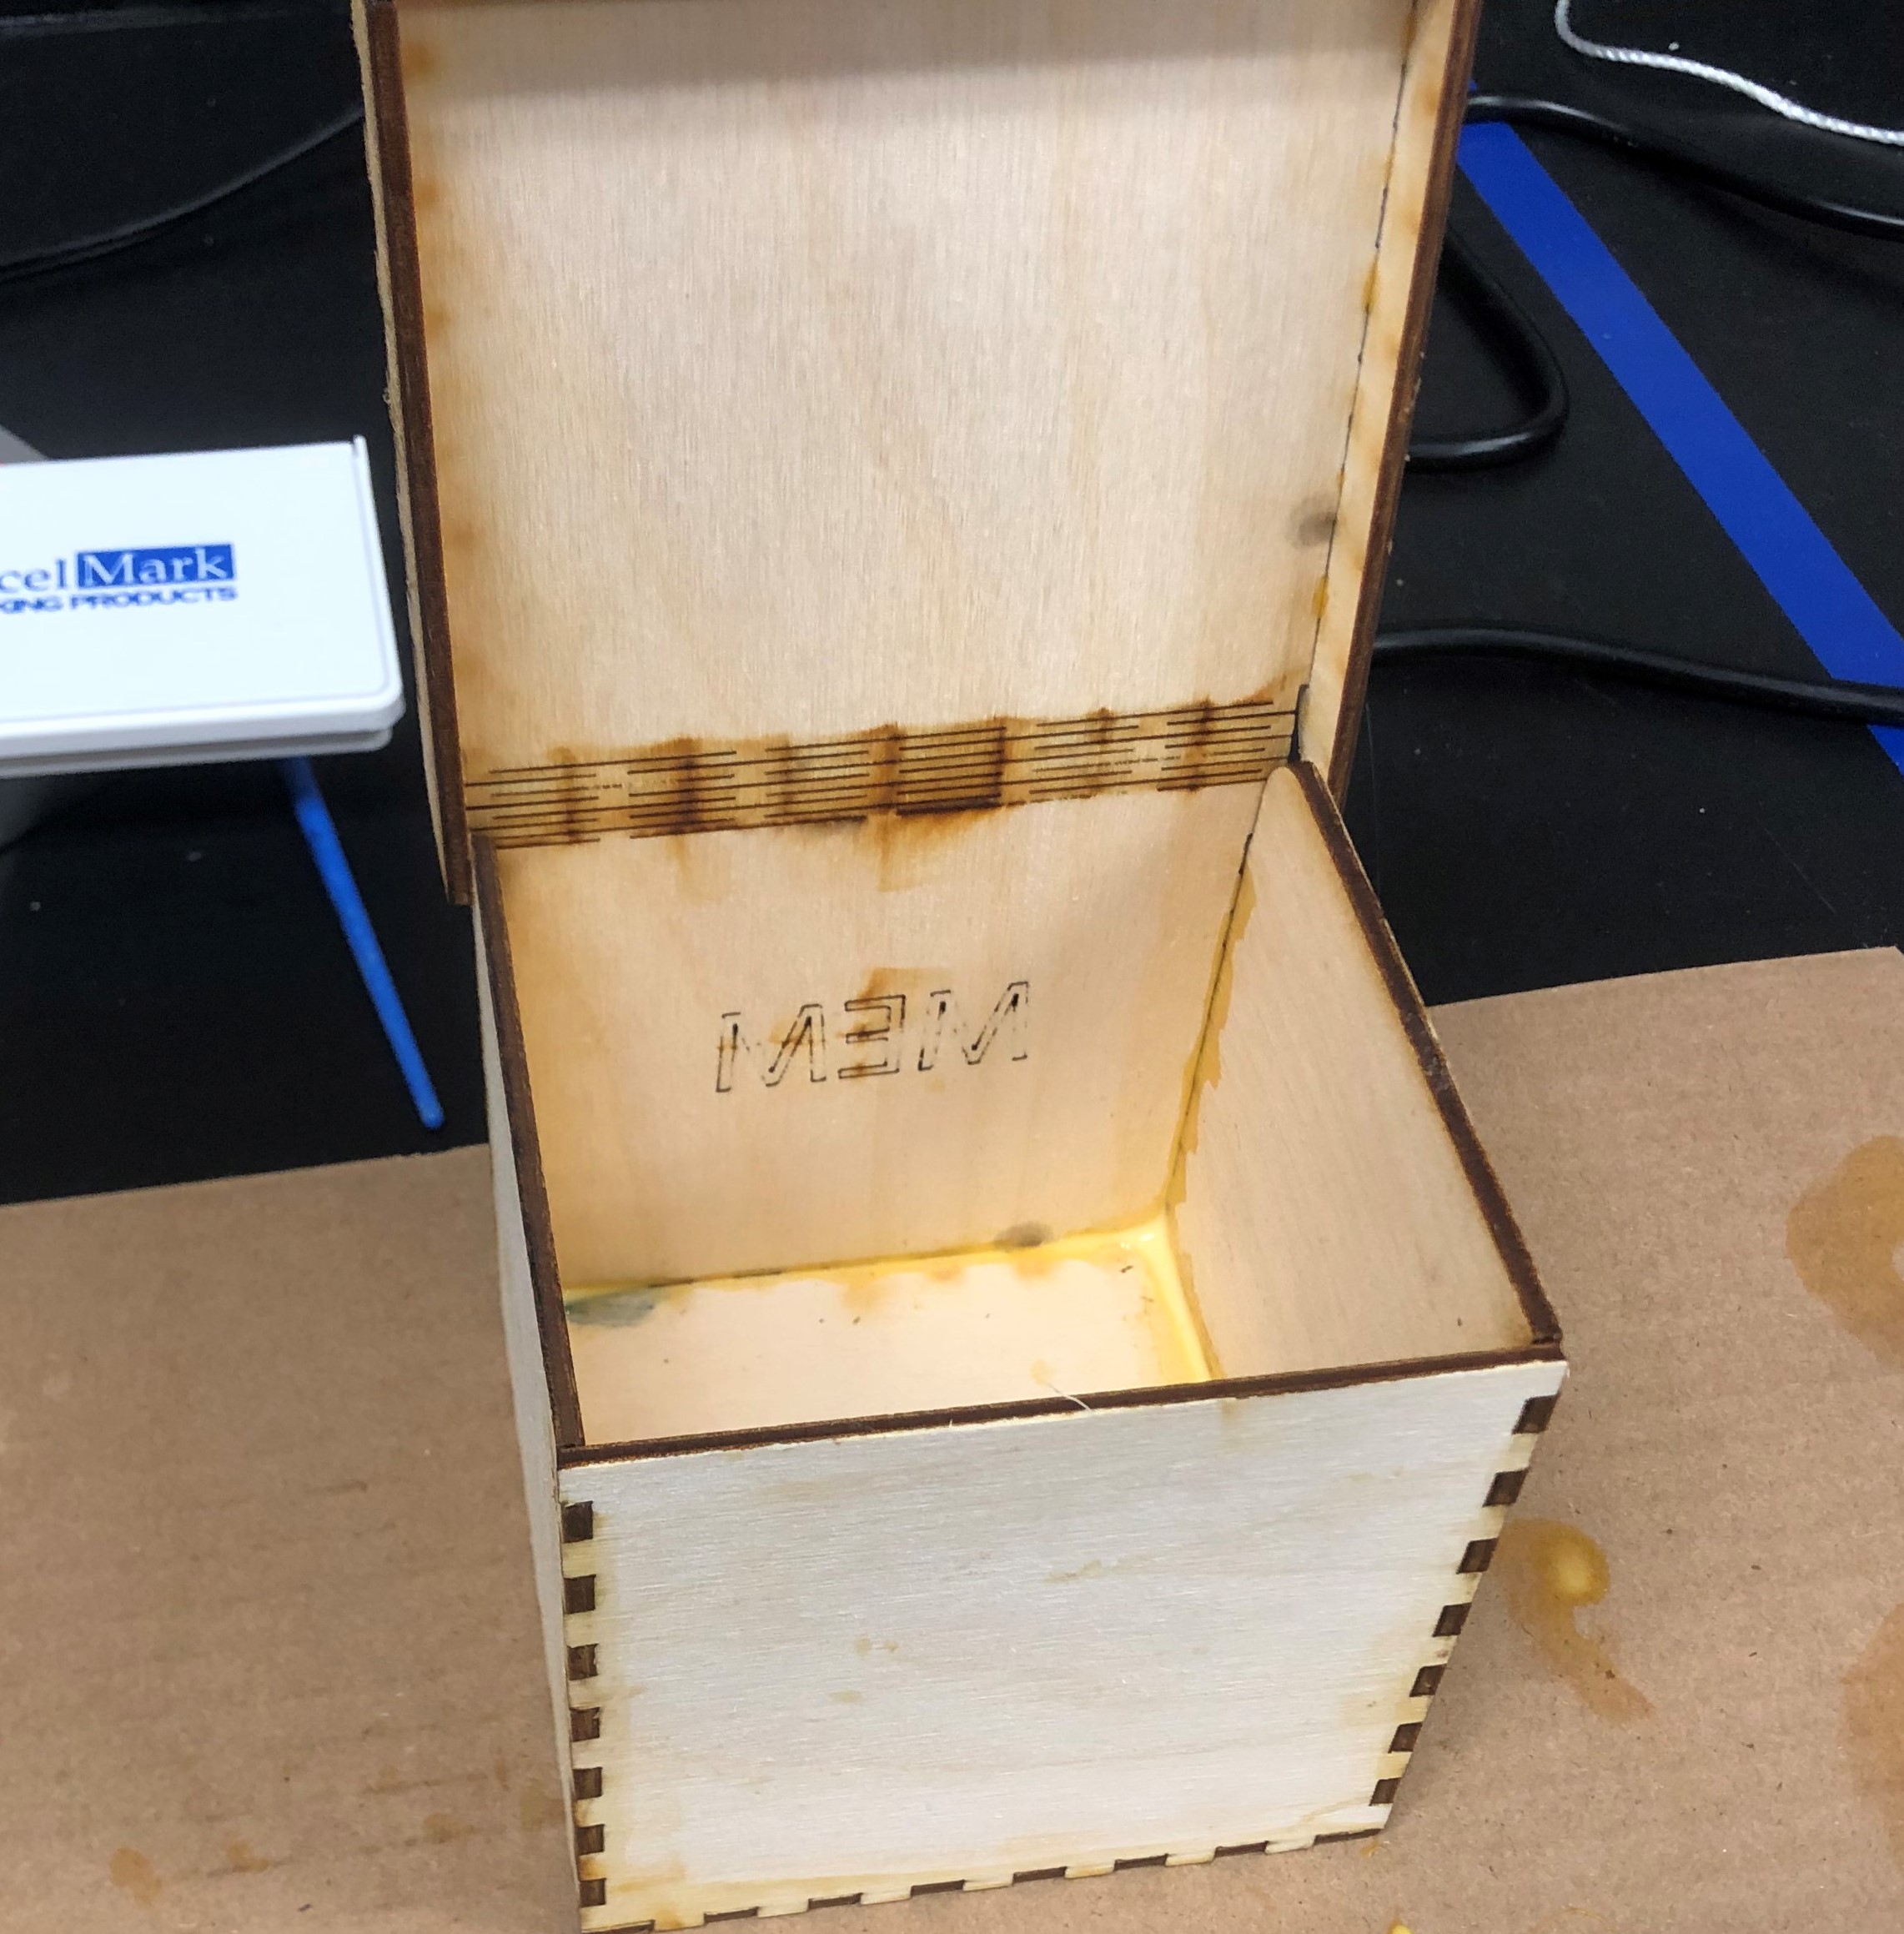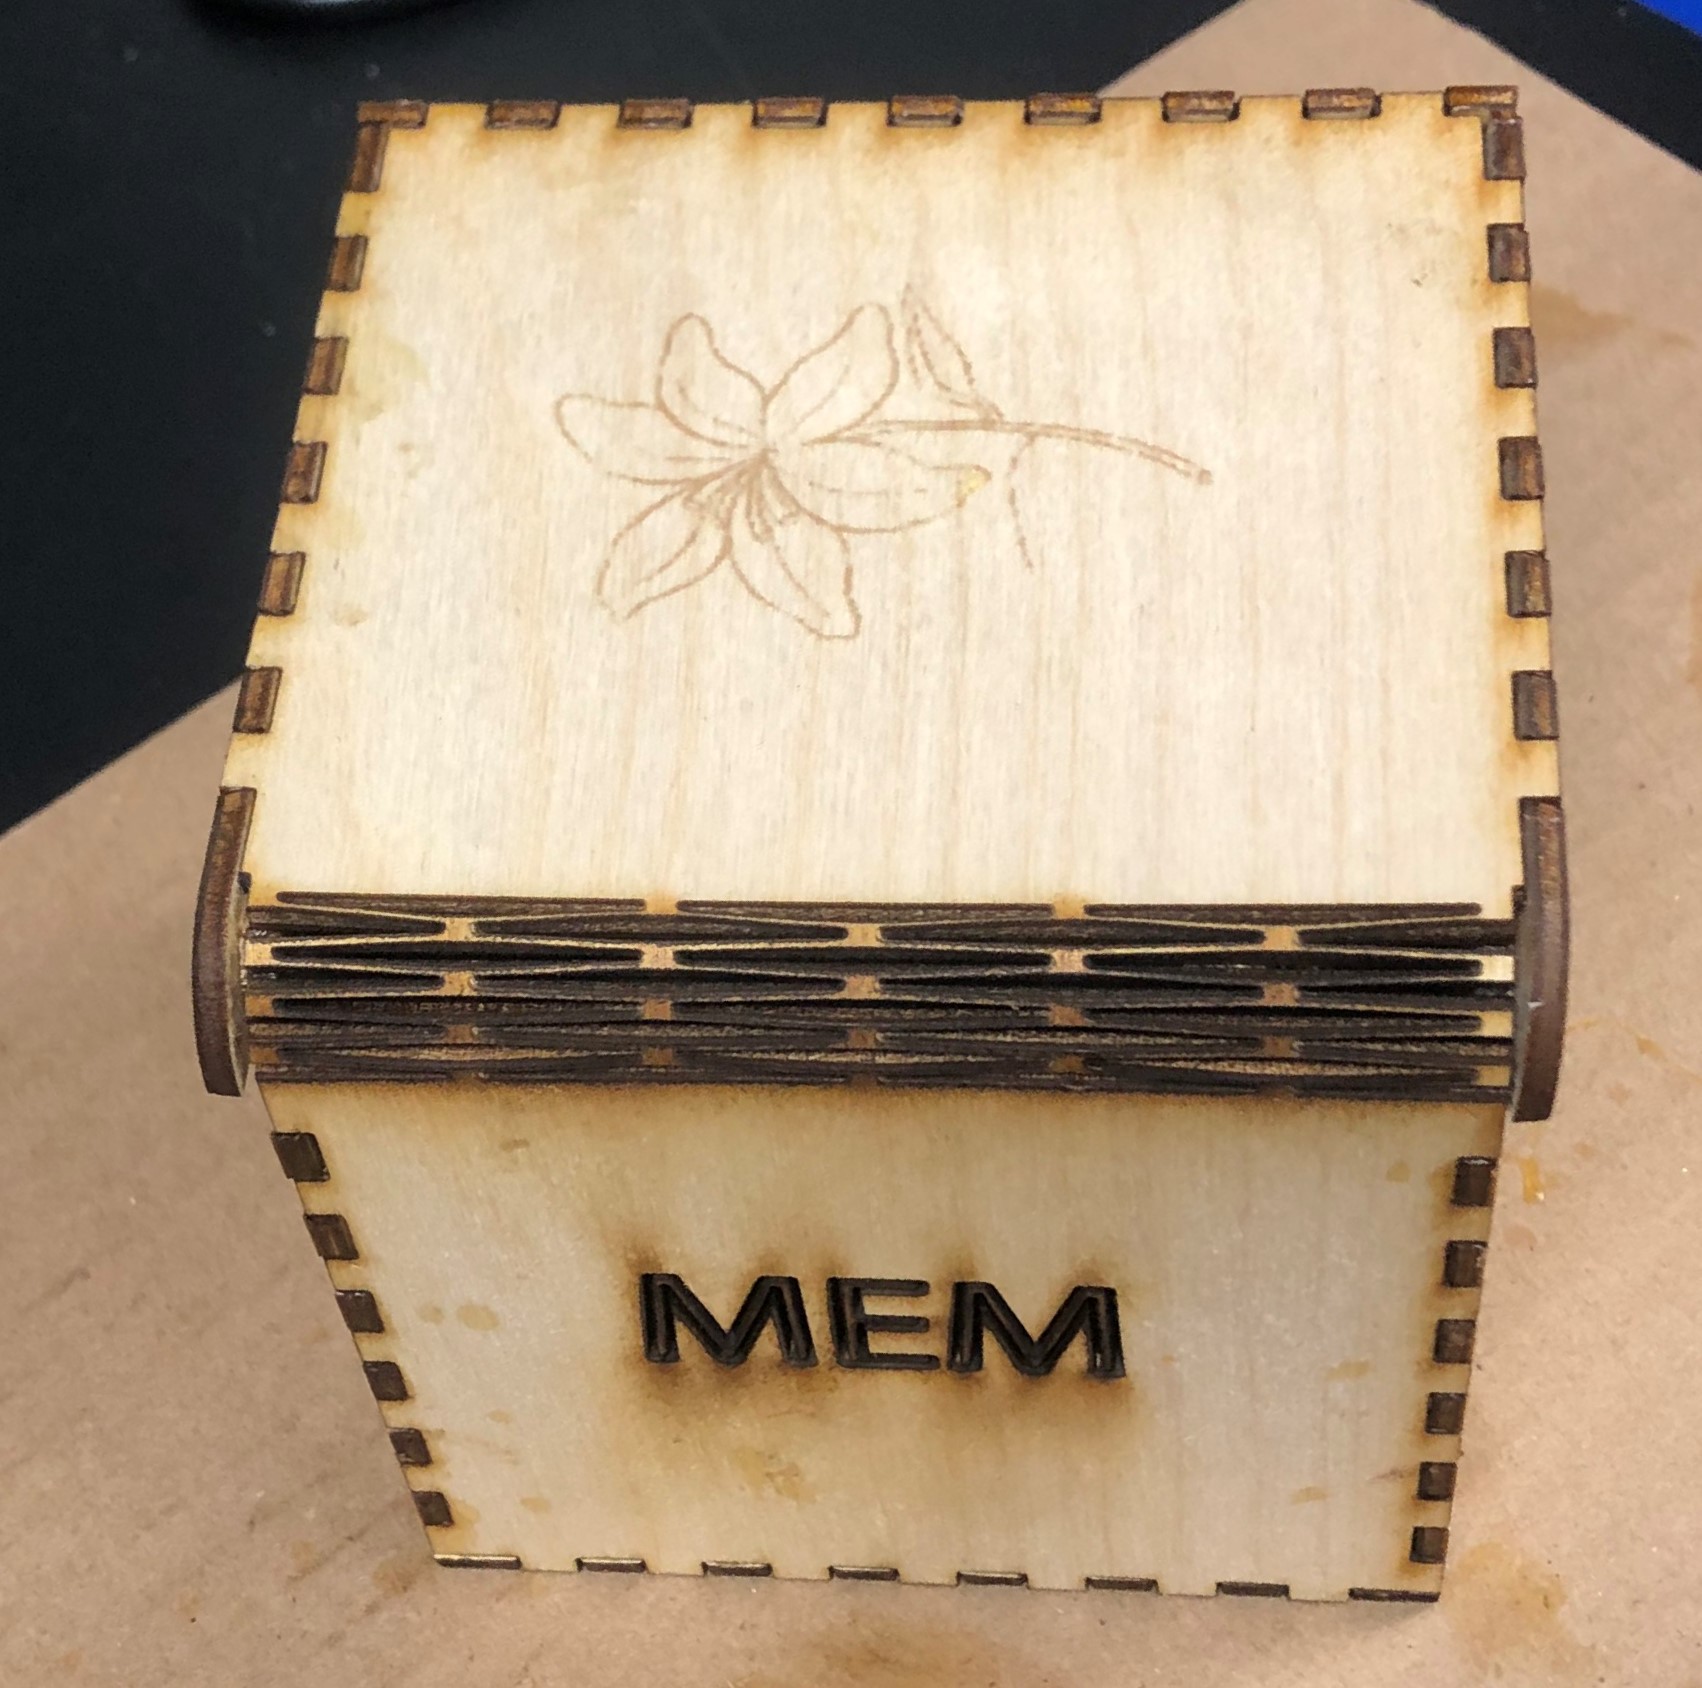
Epilog Laser In order to start this project, I had to be trained in order to learn how to properly use the laser cutter. Before starting the box you need to make 5 test swatches to get familiar with the Vector & Raster settings. After all, tests are successfully done. Now you have to select what type of box design you want to do. I chose Flex.box 3 and added a couple of designs to customize it. For this box, I added my initials "MEM" and added a lily to the top of the box. The part I found the hardest was fixing the settings. Every time I would cut, it wouldn't cut all the way through. The designs would come out okay, but I couldn't get it out without breaking it. Finally, on my last attempt, I got everything to come out perfectly. I glued everything together and it turned out really well.
Design files